Creating your own DIY bookshelf is one of the most rewarding woodworking projects you can tackle. Whether you’re a beginner looking to build your first piece of furniture or a seasoned DIYer aiming to customize storage for your home, crafting a bookshelf allows you to blend utility, creativity, and craftsmanship. This guide will walk you through every step—from planning and choosing materials to assembling and finishing your custom shelf unit.
Why Build a DIY Bookshelf?
Bookshelves aren’t just for books—they’re for memories, collections, and style. By building your own, you have control over:
- Size & Shape: Fit into any nook or space in your home.
- Material Choice: Match your home’s tone with rustic, modern, or minimalist wood.
- Design Details: Add character with live edges, paint, or decorative joinery.
- Cost Control: Often cheaper than store-bought units, and more durable too.
- Satisfaction: There’s pride in seeing your creation stand tall in your space.
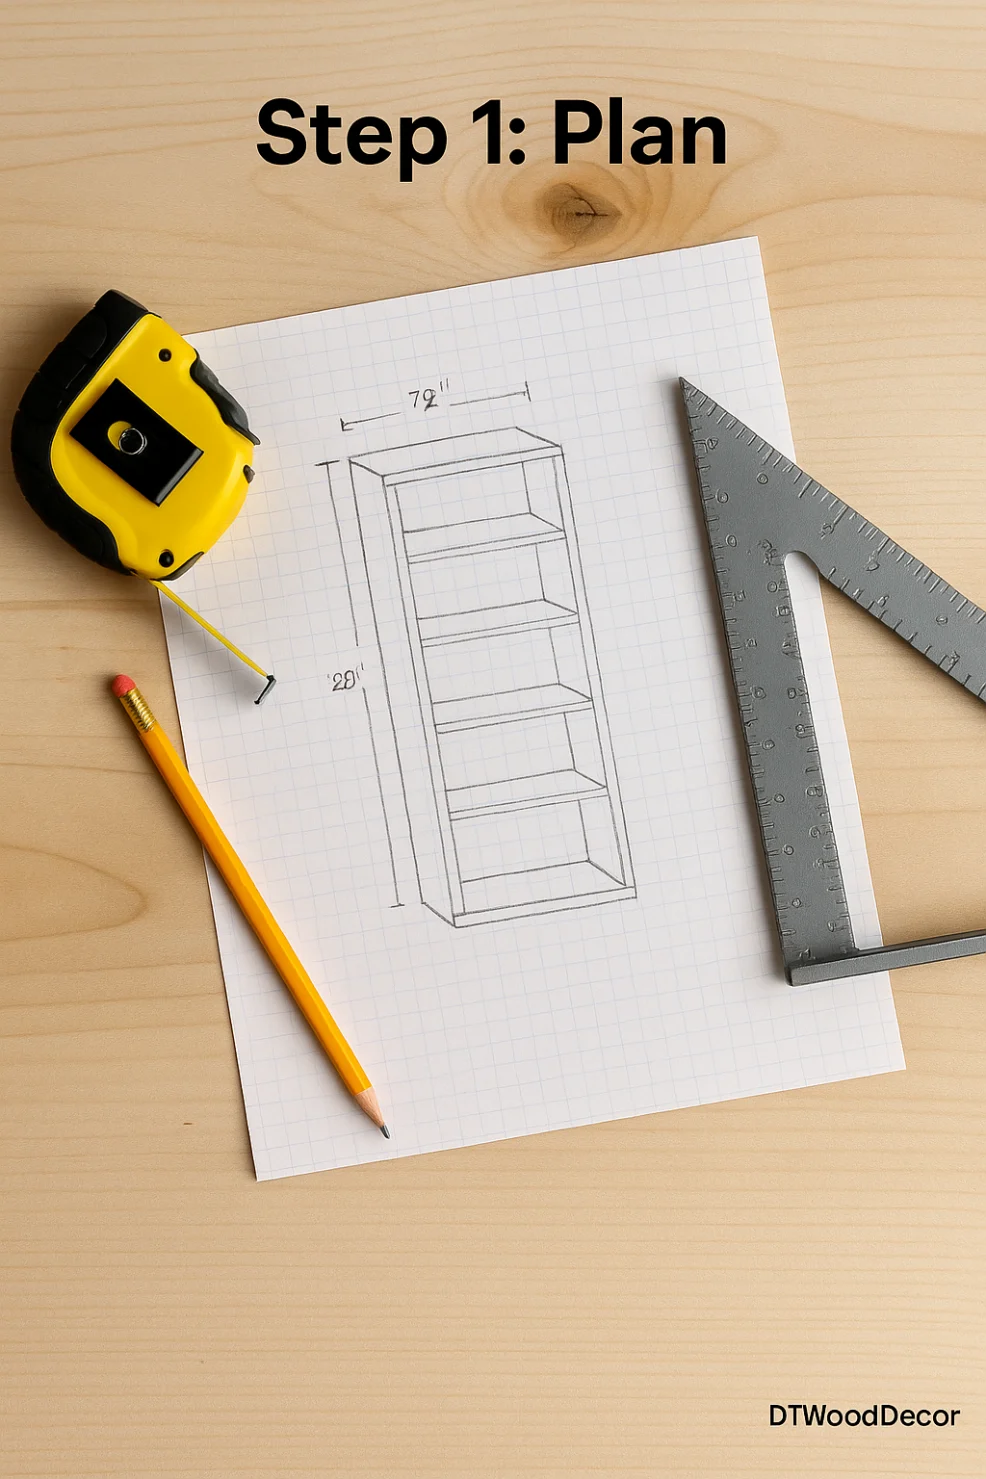
Step 1. Planning: Start with a Vision
Before grabbing your tools, it’s essential to answer these questions:
What will your bookshelf hold?
- Books? Go for deeper and more reinforced shelves.
- Decor? Lighter wood and shallow shelves may be fine.
Where will it go?
- Wall-mounted or free-standing?
- Corner, hallway, bedroom, or office?
How big?
Measure your space. Allow for breathing room on all sides and factor in wall studs if attaching.
What style do you want?
Here are some popular bookshelf styles:
- Classic vertical bookshelf
- Ladder bookshelf
- Floating wall shelves
- Built-in alcove shelves
- Live edge modern shelves
Sketch a rough plan with height, shelf spacing, and materials. Tools like SketchUp or simple grid paper can help visualize your idea.
Step 2. Materials & Tools
Wood Options:
- Pine: Affordable and easy to work with
- Oak: Durable with beautiful grain
- Birch Plywood: Ideal for clean cuts and stability
- Walnut, Cherry, or Maple: Premium look and strength
Consider reclaimed or live-edge wood for a rustic vibe.
Tools You’ll Need:
- Tape measure
- Pencil & square
- Circular saw or table saw
- Drill/driver + screws
- Clamps
- Sander or sandpaper (120–220 grit)
- Wood glue
- Safety gear (goggles, gloves, dust mask)
Optional:
- Router (for rounded edges)
- Stud finder (if wall mounting)
- Wood filler and paint/finish of your choice
Step 3. Cutting the Wood
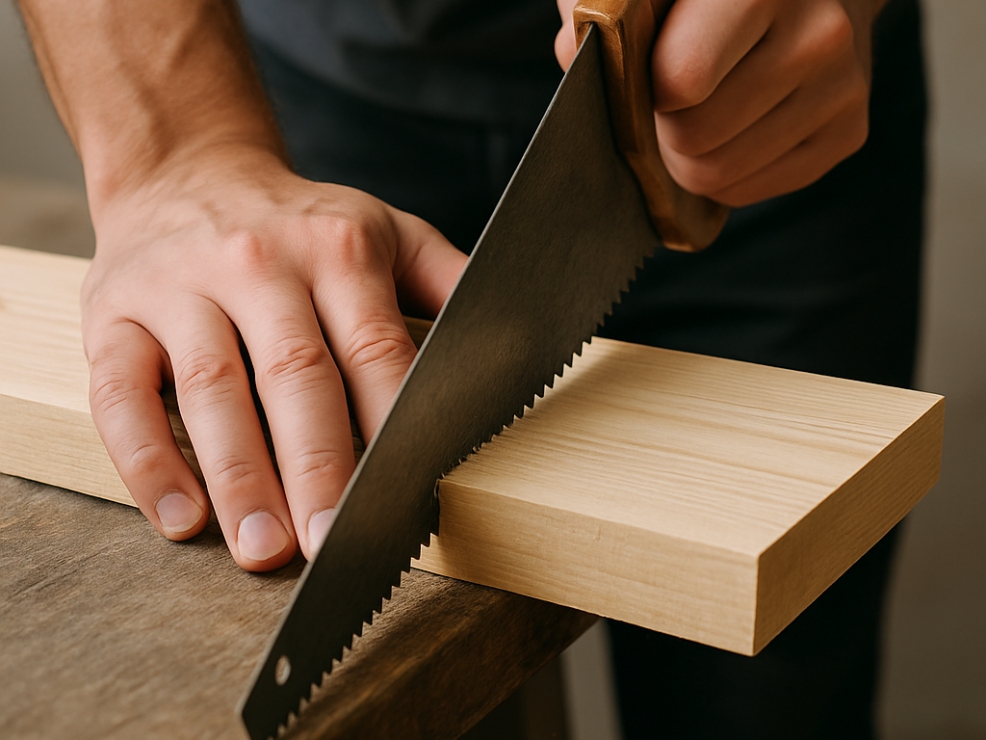
Based on your plan, cut:
- Two vertical side panels
- Several horizontal shelf boards (typically 3–6)
- Top and bottom framing pieces
- Optional back panel (plywood or slats)
Tips:
- Double-check all measurements before cutting.
- Use a guide or square to ensure straight cuts.
- Label each piece with chalk or pencil.
Step 4. Building the Frame
Lay out your cut pieces and begin assembling the outer frame.
- Attach the top and bottom boards to the side panels using glue and screws.
- Use clamps to hold the frame square while securing.
- Drill pilot holes first to avoid splitting.
- Use a level at every step to keep your frame aligned.
This skeleton forms the backbone of your bookshelf.
Step 5. Installing the Shelves
Decide on shelf spacing—most bookshelves have shelves spaced 10″–14″ apart.
- Mark the location of each shelf on both side panels.
- Drill pilot holes and apply glue at joints.
- Secure shelves with screws from the outside, or install hidden brackets for a sleeker finish.
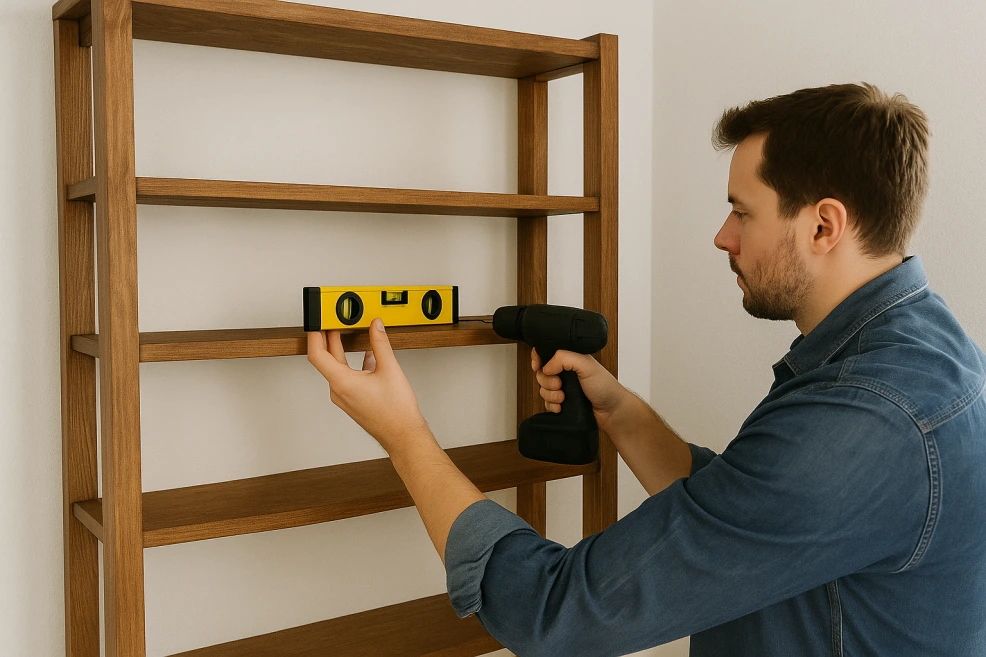
Pro Tip: Add vertical dividers for additional support on longer shelves.
6. Optional Back Panel
Adding a back panel increases rigidity and gives a finished look.
- Cut a piece of plywood to match the rear dimensions.
- Secure with wood glue and nails or screws.
- Consider painting or staining it separately for contrast.
7. Sanding and Surface Prep
Don’t underestimate this step—it makes a big difference!
- Start with 120-grit sandpaper to smooth edges and surfaces.
- Finish with 220-grit for a soft, clean finish.
- Remove all dust before staining or painting.
Check for: Splinters, rough spots, uneven joints.
8. Finishing: Stain, Paint, or Seal
Natural Look:
- Apply a wood stain (walnut, oak, driftwood gray).
- Let it dry, then seal with a clear polyurethane or Danish oil.
Painted Finish:
- Apply wood primer.
- Add two coats of latex or chalk paint.
Tip: Use a brush for texture or a roller for smoothness.
9. Mounting or Placing
If your bookshelf is tall or heavy, secure it for safety.
Freestanding:
- Add felt pads to the base to protect floors.
- Use angle brackets if placing against a wall.
Wall-mounted:
- Use a stud finder.
- Anchor brackets into studs, or use toggle bolts if no stud.
- Attach with screws and confirm it’s level.
10. Styling Your Bookshelf
Now comes the fun part—personalizing!
Ideas:
- Mix books vertically and horizontally.
- Add framed photos, plants, or candles.
- Display collections or travel souvenirs.
- Use baskets for hidden storage.
Rotate decor with the seasons to keep it fresh.
Common Mistakes to Avoid
- Skipping the plan: Always measure twice.
- Overloading shelves: Stick to weight ratings or use thicker boards.
- No wall anchoring: Especially dangerous with children or pets.
- Poor finish: Rushing the paint or stain can ruin your look.
- Weak joints: Use quality glue and pre-drill all screw holes.
DIY Bookshelf FAQs
Can I build a bookshelf without power tools?
Yes, but it will take longer. A handsaw and screwdriver can work with patience.
What wood is best for beginners?
Pine is affordable and forgiving, while plywood offers straightness and strength.
How long does it take?
It depends, of course. A weekend is typical—from start to full dry time for finishes.
Final Thoughts: Why You Should Build Your Own Bookshelf
Building a DIY bookshelf is more than a project—it’s an opportunity to create something functional and beautiful that reflects your personal style. Every cut, sanded edge, and brush of stain adds your mark to a lasting piece of furniture.
Whether you’re storing paperbacks, styling a living room wall, or adding storage to a home office, your handmade bookshelf will always be more than just a shelf—it’ll be a story.
If you’re inspired to build your own or are looking for high-quality handcrafted wooden shelves and furniture, be sure to check out the stunning collection at DTWood Decor, where every piece is a blend of nature, craftsmanship, and timeless design.